Tuesday Lesson 1 Darkroom
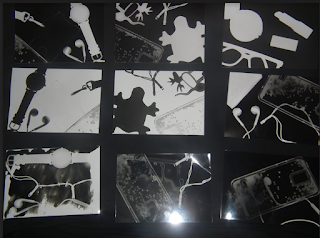
Today we went into the darkroom to make photograms and produce pinhole photographs. We started by using photographic paper with everyday objects placed on top. The paper was then place on an enlarger which exposed the paper to light causing the objects on top to imprint as light cannot travel through them, and once developed leaving the different shapes white whilst turning the surroundings black. The pinhole photographs were created by placing photographic paper into a shoe box tightly sealed to prevent any light getting in. The box had a pin sized hole on the lid of the box covered with a removable flap that when opened would expose the paper to light imprinting whatever is surrounding the box at the time. Depending on how long the light is exposed will affect how the picture will come out, if the paper is over exposed the photo will be too dark, however if the picture is under exposed it will develop to faint.
Photographic paper, enlarger, different shaped items, tongs, developer, stop, fix, wash and dryer.
shoe box, photographic paper.
Purpose-
photographic paper- The paper was placed on the enlarger to be exposed to light to imprint the items.
Enlarger- To expose the paper to light.
Items- They are placed on top of the paper to create outlines.
Tongs- To lift the paper out of the chemicals and move them to the next tray to prevent touching the chemicals with bare hands as they are toxic.
Developer- This develops the pictures imprinted on the paper.
Stop- This prevents the picture from over developing.
Fix- The fixer stabilises the image, leaving behind the metallic silver that forms the image.
Wash- This washes the remaining chemicals off the photo to make it safe to handle.
Dryer- This is a machine that once you place it through it dries the photo and prevents having to wait for it to air dry.
Shoe box- this was used to place the paper in and when you were ready to open the flap and expose the paper to the surroundings.


Comments
Post a Comment